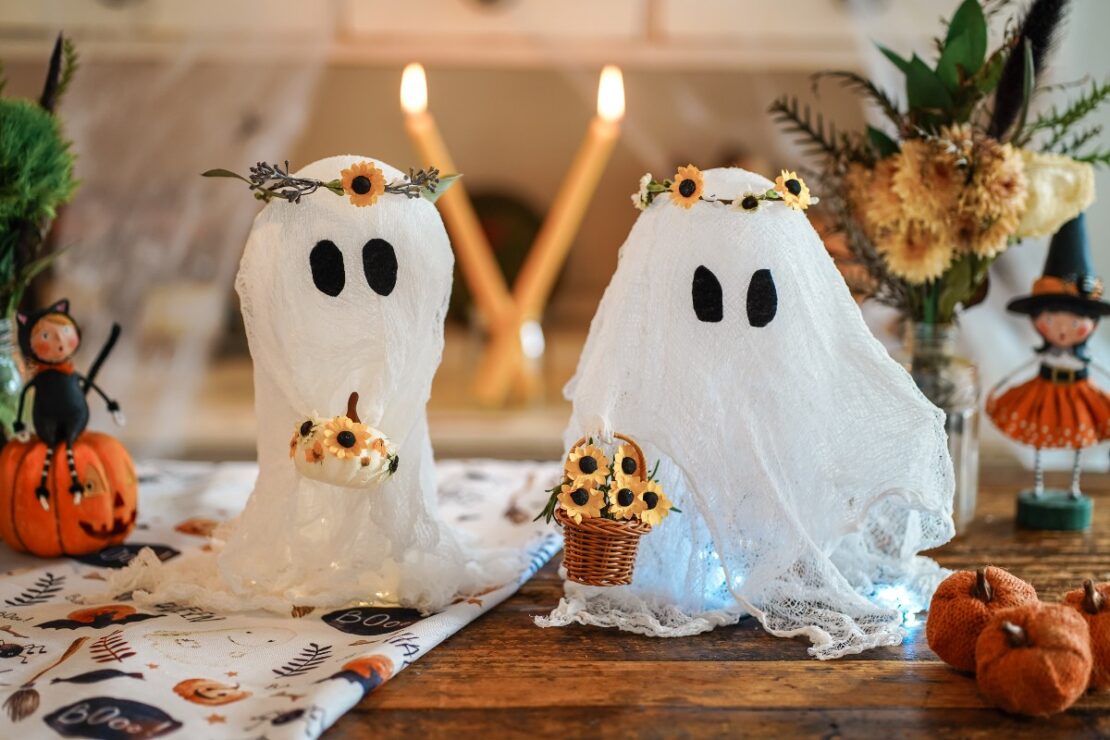
Cheesecloth Ghosts: A Halloween Craft for the Whole Family
Who remembers this spooktacular craft from their own childhood? A fun tradition that we very much want to pass along to all our herbalist friends, Halloween cheesecloth ghosts are cute, easy, and customizable. As an herbalist, you may just have everything you need on hand to create these adorable seasonal crafts. Plus, this gives you the opportunity to use those extra jars we know you have stashed—and cheesecloth ghosts make for the perfect kid-friendly Halloween activity!


Un-boo-lievably Easy Craft Steps
This Halloween-inspired craft is perfect for the whole family. Use them for your indoor decoration on tabletops or create a few to decorate for a pumpkin carving party (you’ll be the ghostess with the mostess). Or for all the homeschool families, this is a wonderful art project to incorporate into your October lesson plans.


Supplies You Will Need
There are a few ways you can create your own cheesecloth ghosts, but this tutorial will showcase the method using liquid starch. You can also use Mod Podge instead. Additionally, this tutorial will showcase using a styrofoam sphere for the head, but a small balloon can be used to achieve the same look.
For this craft, you will need to break out a couple of canning jars– we know you’ve been waiting for this day—the day you finally get to use some of those jars saved for a “just in case” moment. Well, here it is—your moment! You can use either a pint-size or quart-size canning jar depending on how large you’d like your ghosts to be. You will also be using the outer part (the ring) of the canning jar lid to secure the arms for the ghosts. That will be achieved using pipe cleaners. Additionally, you will need a few yards of cheesecloth. Depending on the size of your jar, each ghost will need roughly 2 yards of cheesecloth. Lastly, styrofoam balls, liquid starch, and a piece of black felt are needed.
The kids are going to love this fun DIY! It pulls in all sorts of hands-on skills and even a little sensory play to go along with it. Keep in mind, however, that the ghosts do take a day to dry before you can move on to the next and final steps. I like to pre-warn my little guy about that so that he knows ahead of time.

Cheesecloth Ghosts
Here’s a craft every herbalist has been waiting for! Time to use those jars you’ve been keeping around, roll out the cheesecloth, and get ready for a spooktacular fun DIY for the whole family.
Cheesecloth
Canning jars + lid
Pipe cleaners
Styrofoam balls
Liquid starch
Black felt
Hot glue
Optional accessories

In Closing,
Save these fa-boo-less cheesecloth ghosts for years to come! They make such cute additions to Halloween decor. Not to mention, we love a craft that can pull in some of our herbie supplies and allows for so many “dad jokes” like what’s a ghost’s favorite type of fruit? Boo-berries! Move over pumpkin carving, you’ve got some competition!
For more Halloween ideas, see:
- DIY Herbal Halloween Lollipop Recipe
- Sanderson Sisters S’mores With Herbal Chocolate and Marshmallow Root Marshmallows

About Post Author