Handmade Floral Paper: A Family-Friendly Project
Herbal craft projects help fuel our creativity and reinvigorate our connection with the natural word. Like all plant lovers, our hearts skip a beat whenever we’re presented with just-for-fun herbal creations, like homemade floral cookies and pressed flower arrangements. As such, you can imagine our excitement when a few of our resident herbalists presented the following family-friendly project for handmade floral paper!
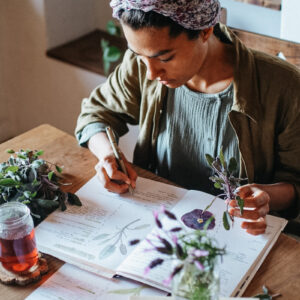
The following floral paper project is part of the curriculum in our new offering, Online Nature Camp: Herbalism for Kids. This program is designed to spark children’s’ curiosity in herbalism at a young age and inspire their interest in the wild world of plants for years to come. Parents, you are welcome to join in the learning yourself – no previous herbal experience needed to enjoy this rich offering for all skill levels!

With the recipe, below, you gain a free sneak peek into our Online Nature Camp, a labor of love created by our team of in-house herbalist parents, including Stacy Karen and Angela Justice. Don’t forget to share your finished project with us on social by using the hashtag #myherbalstudies!

Handmade Floral Paper with Herbs
Adapted from Stacy Karen (Karen, n.d.). This project is excerpted from the Herbal Academy’s Online Nature Camp: Herbalism for Kids.
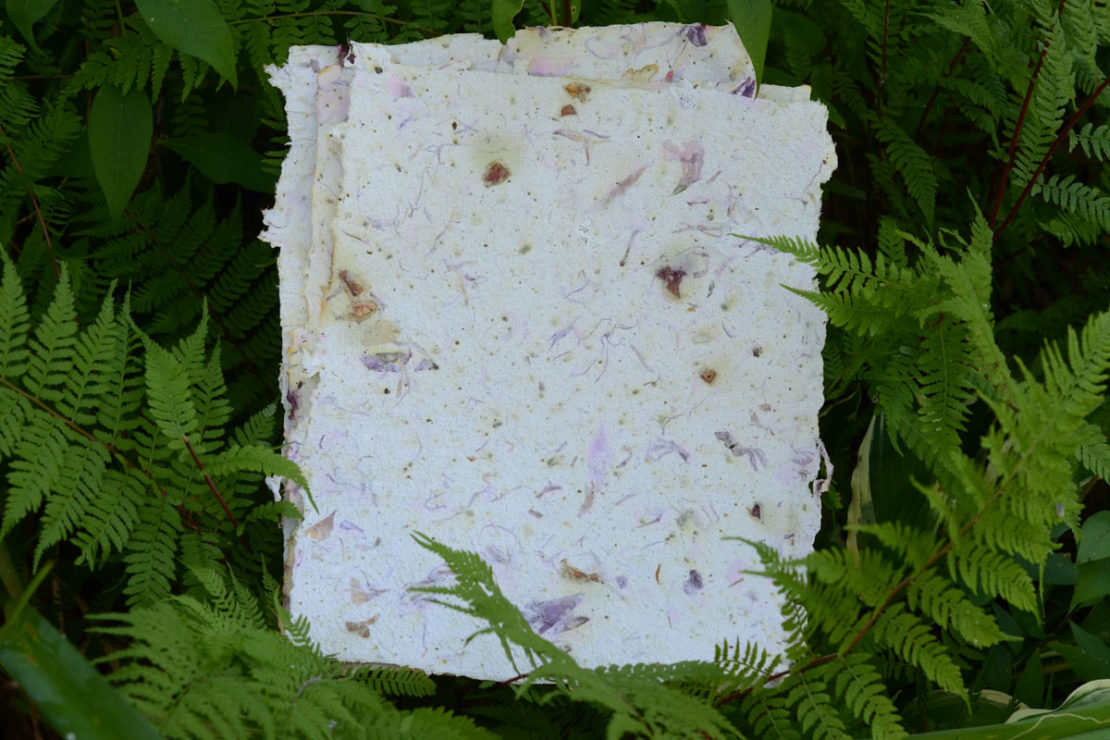
Handmade paper all bespeckled with plants is just beautiful! You can make your own and then use it to make the prettiest cards, bookmarks, and more. This activity is great for all ages!
Paper (Any kind of scrap or leftover, used paper will work! This is a perfect way to recycle!)
A large container that will hold a lot of water (A plastic tub or dishpan works well. It should be large enough to fit the mould and deckle.)
Water
Old blender that will not be used again for food
Dried herbs or flower petals—lavender (Lavandula spp.) blossoms, rose (Rosa spp.) petals, calendula (Calendula officinalis) petals, and peppermint (Mentha × piperita) leaves are fun choices
A mould and deckle*
Sponge
Towels
Sheets of newspaper or large pieces of cardboard to dry your paper on
Paper towels
- Place a large tub on a flat surface and tear paper into small pieces over the tub (so they are easy to drop directly into the container). With adult help, pour hot water over the paper and leave to soak for a few hours (or overnight).
- When you are ready to make paper, prepare a drying area by placing a few old towels on a flat surface, then topping with layers of newspaper or cardboard. Lay a paper towel over the newspaper or cardboard to help absorb water.
- Once paper has soaked, blend in small batches. To do this, add a cup or two of the soaked paper to a blender, then fill the blender ¾ full with water. Pulse to blend. The longer you blend, the smoother the paper will be. Get adult assistance with the blender!
- You can add dried flower petals or other plant material at the end of the blending process and pulse briefly to incorporate, if desired. Or, save the plant material until the end and place it on the paper in a decorative manner.
- Set out a large container that is wide enough to fit the mould and deckle. Fill it about ¼ full with water. Pour blended pulp into the water and stir to combine.
- Put the mould and deckle together by placing the frame without net (deckle) over the frame with net (mould).
- Hold the mould and deckle firmly together, and while holding it at a 45 degree angle, dip it into the water and pulp mixture, all the way to the bottom of the container. Then lift upward, holding the mould and deckle horizontally.
- Lift slowly, gently moving mould and deckle from side to side to aid in evening out the thickness of the pulp layer.
- Once you reach the top of the water, hold the mould and deckle above the container and allow the excess water to drain out.
- Remove the deckle from the mould and align the long edge of the mould along the edge of the paper towel in your prepared drying area. Then place the mould face down on the paper towel. Press down gently, then lift the frame away from the paper.
- Scatter small pieces of dried flowers over the pulp and gently press down.
- Lay a paper towel or piece of pellon over the pulp and gently sponge excess water from the paper.
- Leave to dry.
- If paper is beginning to roll up as it dries, use a rolling pin to gently roll it out.
*A mould and deckle is used in homemade paper making. It consists of two frames—the mould frame is covered with a screen and is where the paper is formed. The deckle frame sits on top of the mould and helps to smooth the edges of the paper. You can purchase a mould and deckle or make your own! Here is a resource for learning how to make your own mould and deckle: https://www.paperslurry.com/2014/08/01/make-mould/

REFERENCES
Karen, S. (n.d.). DIY lavender creations [Ebook]. Retrieved from https://nofussnatural.com/diy-lavender-creations/