4 Herbal Recipes That Are Best Made With FRESH Plant Material
In the realm of herbalism, sometimes fresh is best. There is something enchanting about the aroma of freshly picked herbs, the way their vibrant colors catch the light, and the burst of flavor and aroma they add to any herbal recipe. While dried herbs have their place, in some cases they may not be as ideal as their fresh counterparts in terms of potency, fragrance, and nutrients. Embracing the use of fresh herbs can greatly enhance both the sensory experience and health aspects of certain herbal recipes.
In this article, we’ll explore four herbal recipes that shine brightest when made with fresh herbs straight from your garden, local farm, or even your kitchen windowsill. From invigorating teas to topical preparations, these recipes celebrate the unique qualities that only fresh herbs can bring. Each recipe not only enhances the flavor or effectiveness of the herbs but also embraces their natural beauty and vitality. Whether you’re a seasoned herbal enthusiast or just beginning your journey, these fresh herbal recipes will inspire you to incorporate the richness of living plants into your daily life.

Working with Fresh Herbal Plants
The moment a plant is harvested and begins its journey away from its native soil, it gradually loses its vibrancy and potency. This is especially true for aromatic plants, which contain volatile oils and aromatic compounds that contribute to their scent profile and health virtues. These oils volatilize during the drying process or degrade with heat application, leading to a loss of potency and aroma.
In addition, many of the active compounds in herbs, such as antioxidants, vitamins, and polyphenols, are present in higher concentrations in fresh herbs. Drying can diminish these compounds, reducing the herb’s overall potency and health benefits. For these reasons, fresh herbs often have complex aromatic, flavor, and nutritional profiles that can be muted or altered when dried.
However, there are some benefits to dried herbs, and they can still be a rich source of nutrients and beneficial phytochemical compounds, particularly when dried properly. The process of drying herbs preserves them for later use, which is especially helpful in colder months when fresh herbs aren’t accessible. Additionally, certain herbal recipes specifically call for dried herbs due to their lower water content compared to fresh herbs, which can affect the recipe. For example, dried herbs are often chosen for oil infusions and electuaries (honey extracts) because the presence of water in fresh herbs increases the risk of spoilage or rancidity in oil and honey.
Let’s explore four fabulous herbal recipes that are best made using fresh plant material.
4 Fresh Plant Herbal Recipes

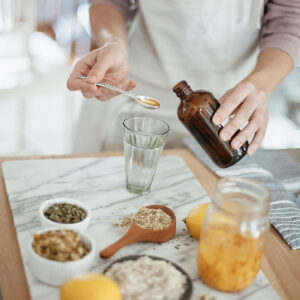
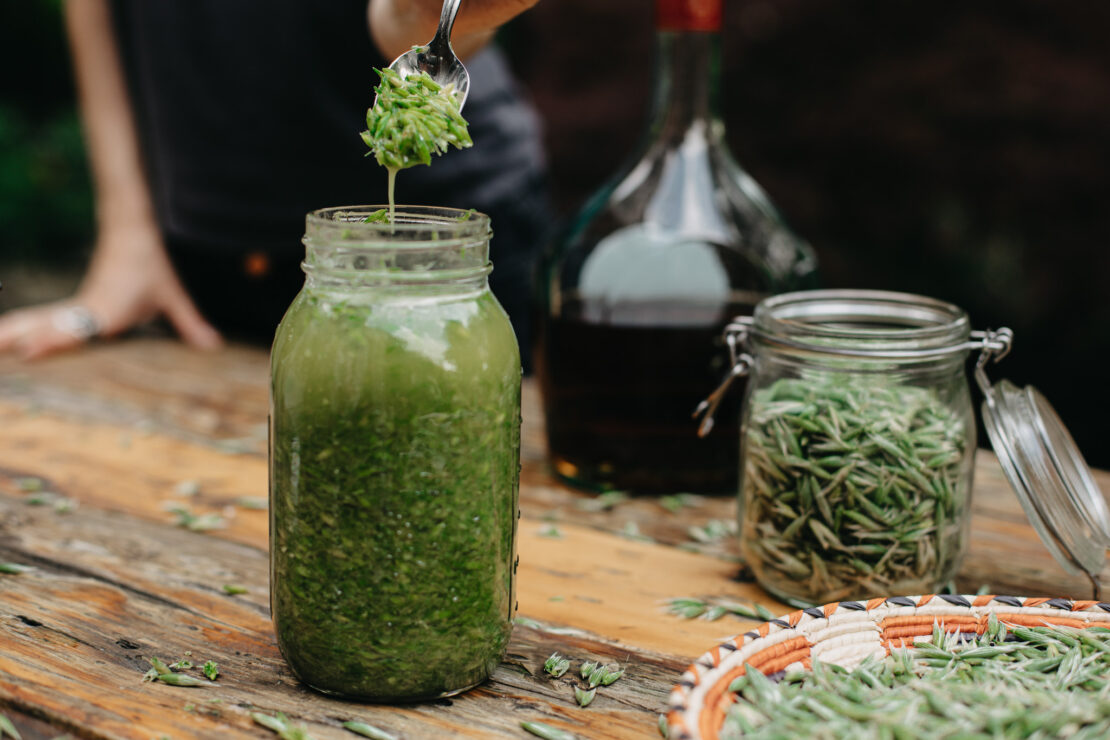
How to Make Fresh Milky Oats (Avena sativa) Tincture
The everyday oat plant, Avena sativa, provides the base for our breakfast oatmeal and creamy oat milk lattes. In herbalism, its dried stems and leaves are known as oat straw, while the fresh seed tops are referred to as milky oats. This name originates from the milky, sap-like liquid that exudes from the fresh oat tops when they are in their milky stage. Making a tincture of the milky oats while they’re fresh preserves their bioactive potency (Herbal Academy, 2014). As the seeds mature in the oat grain or when the fresh milky oats are dried, the milky substance disappears.
Milky oats are highly nutritive and nourishing for the nervous system, containing minerals and trace nutrients such as silica, magnesium, phosphorus, iron, calcium, protein, and vitamins A, B, and C (Holmes, 1997 and Berger, 1998). It can also help soothe stress and anxiety and bring overall balance to the mood.

This milky oats tincture can help soothe stress and anxiety and bring overall balance to the mood.
Fresh oat (Avena sativa) milky tops Materials
Scale Vitamins and minerals are soluble in water (not alcohol), while other constituents like alkaloids and saponins are alcohol-soluble. Since milky oats are mineral-rich, we want to use both water and alcohol in the menstruum to maximize the extraction potential of both water and alcohol-soluble constituents (Carr, n.d.). It’s generally recommended to use a menstruum of 75% alcohol and 25% water for fresh milky oats. For this recipe, we will use a 1:2 ratio at 75%, meaning 1 part fresh plant material to 2 parts menstruum. We’ll be using grams and milliliters, so that means for each 1 g of milky oats, we’ll use 2 mL of menstruum.
Milky Oats Tincture
Everclear 151, or 150-proof cane or grain alcohol (75% ABV)
Blender or food processor
Clean and dry glass canning jar with lid
Cheesecloth or fine mesh muslin bag
Label and pen

St. John’s Wort (Hypericum perforatum) Oil
The beautiful and vibrant little yellow flowers of St. John’s wort are known to help ease depression and seasonal affective disorder (SAD). In addition, the flowers can be utilized topically to soothe sore muscles, ease nerve pain as well as mild pain and inflammation associated with sciatica, and address viral skin issues like herpes and shingles (Kloos, 2017).
St. John’s wort flowers are an exception to the general rule of using dried herbs when making infused oils. The fresh flower buds hold a remarkable secret: when squeezed, they release a deep red oil rich in active constituents. Infusing fresh St. John’s wort flowers into oil captures this vivid red hue and enhances their beneficial qualities (Kloos, 2017). According to herbalist Scott Kloos: “Preparations of St. John’s wort made with dried plant material lack the medicinal properties found in fresh plant preparations” (2017, p. 63).
In addition to making this fabulous St. John’s Wort oil, we invite you to discover the four basic categories of herbal preparations, 12 everyday safe herbs to use at home, and 33 DIY herbal recipes from teas and tinctures to salves and oils with our Making Herbal Preparations 101 Course!
St. John’s wort oil is known to help ease depression, seasonal affective disorder, and more.
Fresh St. John’s wort buds and flowers (the ideal ratio is about ⅔ bud to ⅓ flower) Materials
Scale Hot tip: Standard herb ratios for fresh plant oil infusions are 1:3, meaning 1 part fresh plant material to 3 parts oil.
Fresh St. John’s Wort Oil
Carrier oil of your choice (olive oil, jojoba oil, fractionated coconut oil, etc.)
Knife and cutting board
3 clean and dry glass canning jars with lids
Yogurt maker or crock pot
Thermometer
Paper towels
Cheesecloth or fine mesh muslin bag
Funnel
Label and pen

Lemon Balm (Melissa officinalis) Solar Infusion Tea
If you’ve ever experienced the invigorating, uplifting aroma of fresh lemon balm, you’ll understand the striking disparity compared to its dried counterpart. Lemon balm is known to help soothe stress, anxiety, and depression, as well as digestive distress like nausea, gas, and indigestion (Kloos, 2017). This fresh leaf solar infusion herbal recipe does a fantastic job at capturing this plant’s bright, vibrant lemony aroma and flavor, which is sure to put a smile on your face.

Lemon balm tea is known to help soothe stress, anxiety, and depression, as well as digestive distress like nausea, gas, and indigestion.
Fresh lemon balm (Melissa officinalis) leaves (approximately 1 cup) Materials
Glass canning jar with a tight-fitting lidLemon Balm Solar Infusion Tea
Filtered water (4-6 cups)
Strainer or cheesecloth
Sunlight
Note: In any infusion prepared without high heat, there is a higher risk of potential bacterial growth. To minimize this, use clean equipment, filtered or boiled water, steep in the sun for just a couple hours, and store in the refrigerator.

Fresh Mint (Mentha x piperita) Mojito Mocktail
This refreshing peppermint herbal mocktail recipe is the perfect drink on a hot summer day. Peppermint is renowned for its ability to support the digestive system. According to herbalist Michael Moore, “There is nothing as effective as peppermint for dyspepsia, stomach cramps, and nausea. Drink it, drink it, drink it” (Moore, 1993, p. 202). Fresh peppermint leaves and mint honey simple syrup really take this classic beverage to the next level.

Fresh peppermint leaves and mint honey simple syrup really take this classic beverage to the next level.
Fresh peppermint (Mentha x piperita) leaves (approximately 20) Materials
Saucepan and stovetopFresh Mint Mojito Mocktail
1 cup raw honey
¼ cup water
Sparkling water
Ice cubes
Fresh lime
Spoon
Mortar and pestle or muddler
Drinking glass
To explore other herbal mixed drinks, be sure to check out our Botanical Mixed Drinks Workshop and recipe book!

REFERENCES
Berger, Judith. (1998). Herbal Rituals. New York, NY: St. Martin’s Press.
Carr, J. A. (n.d.) Milky Oats Tincture: What’s the Secret? Old Ways Herbal. https://oldwaysherbal.com/2014/04/22/milky-oats-tincture-whats-the-secret/
Herbal Academy. (2014). Oats Benefits: Getting to know Avena sativa. https://theherbalacademy.com/blog/oats-benefits-getting-to-know-avena-sativa/
Holmes, Peter. (1997). The Energetics of Western Herbs. Boulder, CO: Snow Lotus Press, Inc.
Kloos, S. (2017). Pacific Northwest medicinal plants: Identify, harvest, and use 120 wild herbs for health and wellness. Timber Press.
Moore, M. (1993). Medicinal plants of the Pacific West. Museum of New Mexico Press.
About Post Author