This is ONE preview lesson taken from UNIT 3 in the Online Introductory Herbal Course. The Introductory Herbal Course is made up of 6 units including over 30 lessons and bonus lessons. To learn more about the beginners program, please visit this page. If you are interested in registering for the program, skip to registration.
LESSON 1: IMMUNE SYSTEM
OVERVIEW OF IMMUNE FUNCTION
The fundamental purpose of the immune system is to protect the body from disease. This primarily means protecting against viruses, bacteria, and other disease-causing microbes—otherwise known as germs—along with other pathogens such as parasites and certain species of fungi. The immune system also scavenges dead or injured cells and tissues and removes abnormal cells as they develop.
The immune system does all of this defense work by recognizing what is “self” (the normal or healthy cells and tissues of the body) and what is “non-self” (pathogenic invaders such as bacteria and parasites, and other foreign compounds), and acting to remove or defend against anything that is recognized as “non-self.” Anything that triggers this “non-self” reaction by the immune system is broadly considered an antigen.
Any disease-causing microorganism (i.e., a bacteria, virus, or fungus) is considered a pathogen. Antigens can come from pathogens, but they can also be found on foreign substances such as pollen, dust, or even some types of foods. Most pathogens are infectious organisms that will trigger some degree of immune response in everyone, but response to specific antigens is much more individualized. Most people will get sick if they’re exposed to a flu virus (a pathogen), but not everyone has an allergic response to the same pollen antigens.
Both pathogens and antigens trigger an immune response when the body recognizes them as “non-self.” The reaction may be localized—for example, itchy eyes and a runny nose after you inhale dust or pollen—or systemic, such as fever and muscle aches throughout your body when you have the flu. These are both instances in which the body is working to eliminate a pathogen or antigen; once the “non-self” substance is gone, the immune system slows its defense response and those symptoms of immune reaction begin to subside.
At least, that’s what happens in a healthy immune system. When the immune system is out of balance, however, three general patterns of disease can arise:
- Overactivity or hyperreactivity to antigens, often resulting in allergies and excess inflammation.
- Underactivity or failure to respond to antigens, as in the case of immunodeficiency diseases.
- Breakdown in “self”/”non-self” recognition, where the immune system attacks the body even in the absence of pathogens or foreign substances, as in autoimmune disease.
In addition to the simple presence of antigens and the basic functionality of the immune response, herbalists and other holistic health practitioners take into consideration the idea of biological terrain, or the health of the organism as a whole. Terrain theory is the idea that the internal strength or balance of the individual is responsible for protecting them from disease or illness. It’s sometimes described as an alternative to germ theory, but modern terrain theory doesn’t necessarily mean that germs aren’t the immediate cause of disease; it simply suggests that pathogens are able to take advantage of an environment in which they can proliferate and the immune system can mount the most effective response within the environment of a balanced organism.
IMMUNE RESPONSE
The immune system responds to different types of “non-self” antigens through a complex network of cells and chemical signalling molecules. Although the immune system works together as a whole, it’s often discussed in terms of two primary types of immune response: innate and acquired immunity.
Innate immunity, also called non-specific immunity or immune resistance, is the defense system with which we are born; it is the first line of defense against pathogens and injuries and protects against infection in a generalized way. The skin and respiratory and digestive mucosa are key players in innate immunity, offering chemical and physical protection from pathogens; sweating, coughing, and sneezing are part of innate immune response as are the enzymes in tears and acids in the gastrointestinal tract, mucus, and saliva (MedLine Plus, 2018).
Acquired immunity, also called adaptive or specific immunity, allows cells to respond in a targeted way to specific antigens. If the innate immune response isn’t sufficient to address a pathogen, it will activate the second line of defense, the adaptive immune response. This response includes memory cells that learn to recognize specific antigens, and can then mount a rapid and efficient defense against those antigens in the future. Adaptive immune response is slower to take effect against a new or unfamiliar pathogen—usually several days, rather than a few hours—but very efficient in defending against antigens it has previously encountered. (This is why we are said to “acquire immunity” against certain infectious diseases—after the first time they’re encountered, the adaptive immune response “remembers” the pathogen and steps in to quickly fight off infection.)
Passive immunity is the result of antibodies that are directly introduced from another organism. For example, passive immunization occurs in newborns as a result of antibodies from the placenta and later, from breast milk. Passive immunity gives immediate resistance to a pathogen, but it doesn’t allow the body’s own adaptive immune system to “recognize” the pathogen and produce its own antibodies, so it doesn’t confer long-term resistance (MedLine Plus, 2018).
COMPONENTS OF THE IMMUNE SYSTEM
The immune system is comprised of a team of organs and defense cells spread throughout the body; in order to successfully infect a human host, foreign organisms must pass through multiple layers of this protective network.
The first boundary to infection is the external immune response: the healthy antibacterial terrain of our skin, tears, mucus, saliva, and stomach acid. Normal skin is tough and generally impermeable to bacteria and viruses and it contains specialized cells that send early warning signs to the immune system when they detect foreign substances or pathogens.
Germs that pass through the nasal passage and lungs are trapped in mucus and swallowed, so they can be neutralized by digestive enzymes and acids in the stomach. Tears capture and expel germs before they can enter the body through the eyes. In this way, the body’s external defenses keep most germs in circulation at bay.
PD-USGov
If these physical and chemical barriers fail, the internal immune response sets in. The internal immune response identifies the pathogen and communicates with other cells to organize and coordinate the immune response to eliminate or suppress the germs. The internal immune response includes both innate (non-specific) resistance and acquired (specific) immunity.
The cascade of immune response takes places throughout the tissues of the body— immune cells need to be able to respond to pathogens anywhere they’re found—but there are a number of immune-specific cells and tissues. Next we’ll take a look at some of these key players.
Immune Response Cells
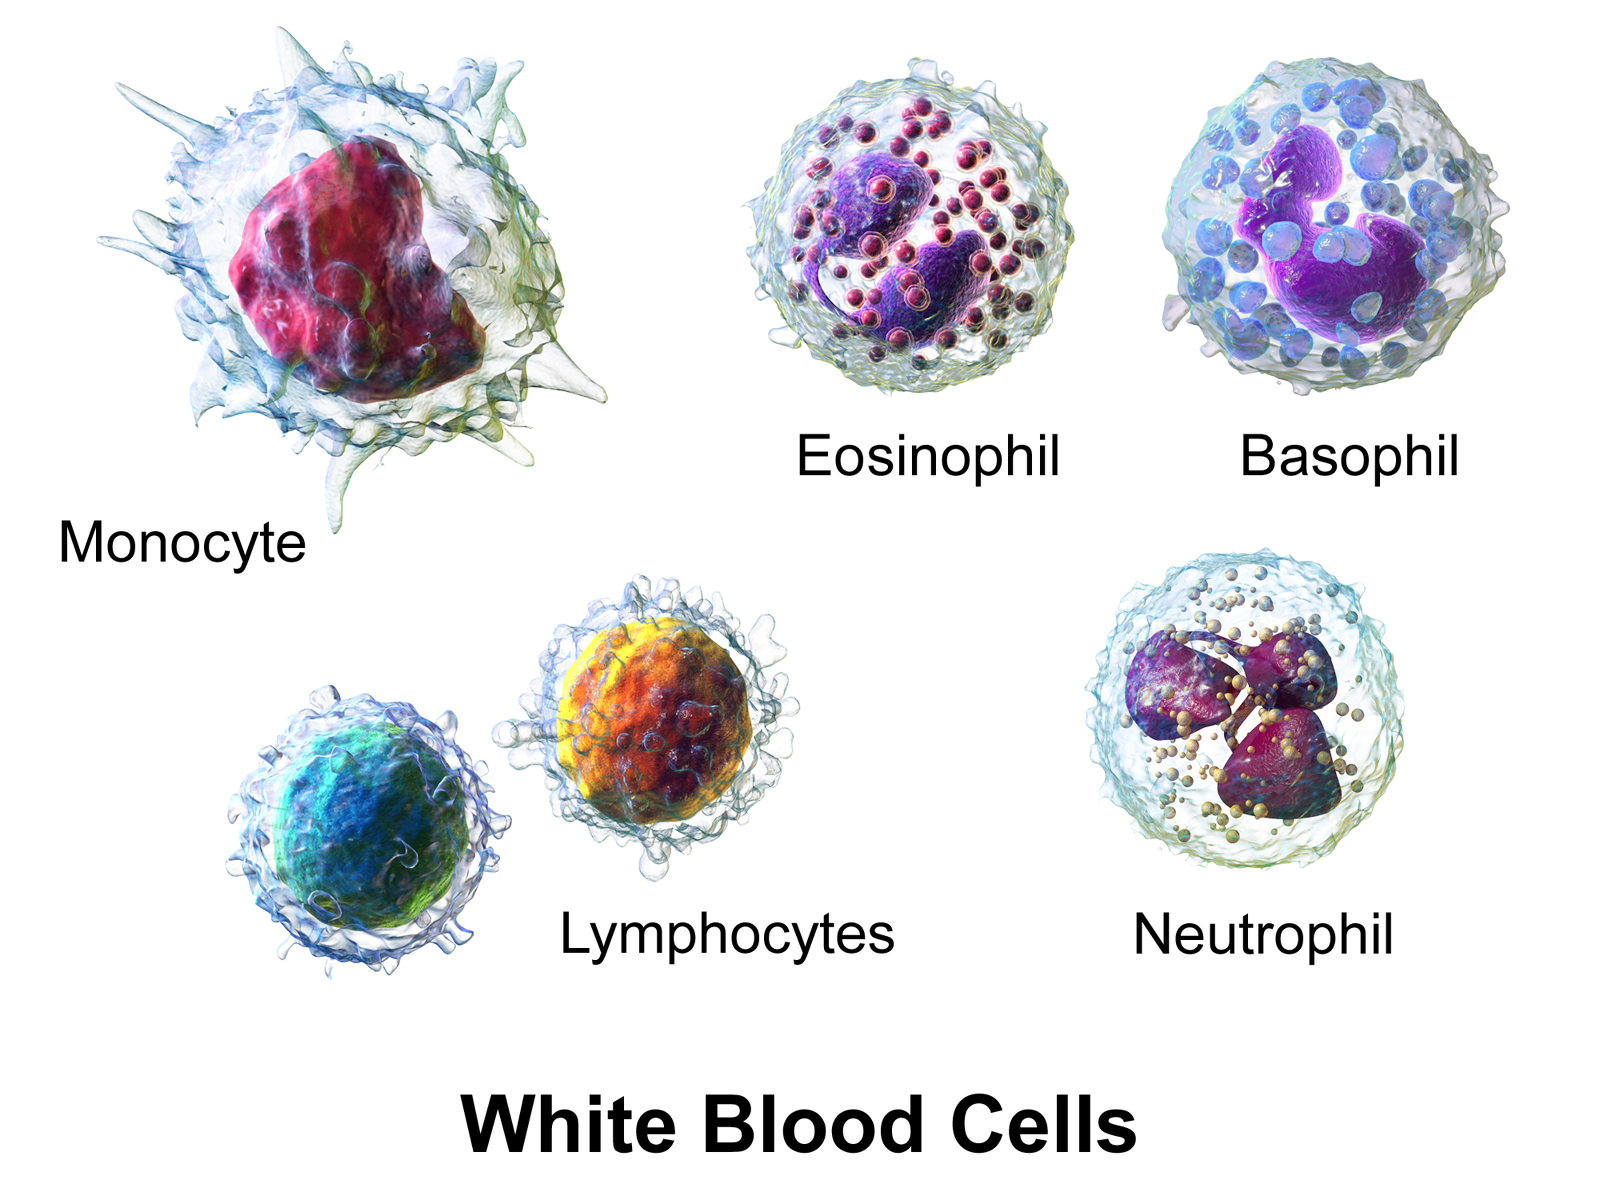
The primary immune response cells are types of white blood cells (WBCs), also known as leukocytes. These are very specialized cells able to chase and engulf other cells and bacteria. They do not replicate themselves; instead they are produced in the bone marrow. Leukocytes are divided into subtypes, according to their structure and unique functions:
Granulocytes: Immune responders found in the blood and tissues; granulocytes help fend off pathogens and are involved in inflammatory immune processes. There are three types of granulocytes: neutrophils, basophils, and eosinophils. Granulocytes are all phagocytes—they ingest and dispose of pathogens and dead or dying cellular debris.
Macrophages: Another type of phagocyte, macrophages help with cleaning up cellular debris and pathogens; they also play a special role in bridging the innate and acquired immune response phases by activating lymphocytes.
Lymphocytes: WBCs that are particularly concentrated in the lymphatic system; there are two types of lymphocytes, T-cells and B-cells, which are both activated during the acquired immune response.
B-cells: Lymphocytes that produce antibodies (proteins that precisely target and neutralize an individual antigen). B-cells also act as an amplifier during the immune response, using chemical signaling to activate more T-cells.
T-cells: Lymphocytes that directly attack pathogen-infected cells and release cytokines—chemical signals—that direct the progression of the immune response. T-cells develop into specialized subtypes with different functions: T-helper and T-killer cells, memory T-cells, and regulatory T-cells.
Blausen.com staff (2014). “Medical gallery of Blausen Medical 2014“. WikiJournal of Medicine 1(2). DOI:10.15347/wjm/2014.010. ISSN 2002-4436. – Own work. Used under CC BY 3.0 license.
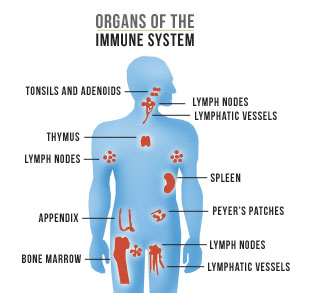
Immune-Related Organs and Tissues
Lymphatic system: The lymphatic system, also known as the lymph system, is a network that passively carries lymph fluid throughout the body, using the everyday movement of the body’s skeletal and smooth muscles, and removes waste, dead cells, toxins, and pathogens. Lymph fluid originates as interstitial fluid that surrounds cells; it collects in lymph capillaries and then moves upward through the body toward the neck, where it eventually drains into venous circulation. Along the way, lymph fluid passes through masses of specialized tissue, known as lymph nodes, which act as filters. (These are the “glands” that may swell during infection, although they’re not technically glands.)
Spleen: Located on the left side of the abdomen, near the stomach, the spleen produces lymphocytes and acts as a large lymph node, filtering out microorganisms and old red blood cells from the blood. It also acts as a storage reservoir for leukocytes (white blood cells), particularly the monocytes that move quickly to the site of inflammation to destroy pathogens and cellular debris. The spleen has a number of immune functions and anyone who has had their spleen removed due to injury or illness has a much higher risk of developing infection.
Bone marrow: A soft, spongy tissue found in the center of the large skeletal bones, bone marrow is a key component of the immune system, as it is the primary site of both red and white blood cell production. White blood cells have a lifespan of about 10 days, so they must be produced continually for normal immune function; consequently, bone marrow diseases have a profound effect on immune health.
Thymus gland: Located between the breastbone and the heart, the thymus gland acts as a training ground for immature T-cells. After production in the bone marrow, young T-cells move to the thymus, where they are exposed to various antigens and learn to differentiate between “self” and “non-self” cells. The size and activity of the thymus gland naturally decrease with age; this is linked with a decline in adaptive immune function among the elderly.
Experiential Exercise: Getting to Know Your Immune System
We are all born with the same organ systems that share fundamental functions in common. However, we are also uniquely individual, and our bodies have unique ways of expressing our bioindividuality and genetic predispositions. Even when we are in a state of general wellness, our body systems have their own quirks and ways of letting us know about its state of balance (or imbalance). Some people experience sinus infections once a year, while others may never catch colds, but find that their eczema is worse in the fall and winter.
In this and the next two exercises that follow, you will investigate the ways that your body systems communicate to you, based on what you’ve learned in the lesson. In addition to naming your unique symptoms (no more than three per body system), pay attention to any triggers associated with them, however minor you may experience them. For example, you may notice that you normally catch a cold after winter holidays have ended or your seasonal allergy symptoms feel worse after arguing with your partner. An example entry is included in the table below.
Also, notice the actual physical phenomena that take place in your body when a system feels “off.” For example, if you know that you are allergic to cats, think beyond the idea of “cat allergy” to describe what that looks like in your body. Do you sneeze uncontrollably? Do your eyes become red and teary? Do you feel itchiness anywhere in your body?
As you learn more about herbalism, it will be important to be able to identify and describe phenomena as clearly and accurately as possible—these are the foundation of specific indications used by herbalists from historical times to the present to identify appropriate herbs for a particular imbalance or symptom.
Remember that you are uniquely yourself—however an imbalance is labeled, it may still manifest quite differently in someone else!
EXPLORING YOUR IMMUNE SYSTEM SYMPTOMS
| Imbalance or Symptom | Triggers or Exacerbating Factors | Physical Phenomena Associated with Symptom |
| Athlete’s foot | More bothersome in summer than other times of year | Skin between toes is red, moist and itchy. Skin peels when moist or flakes off easily when dry. |
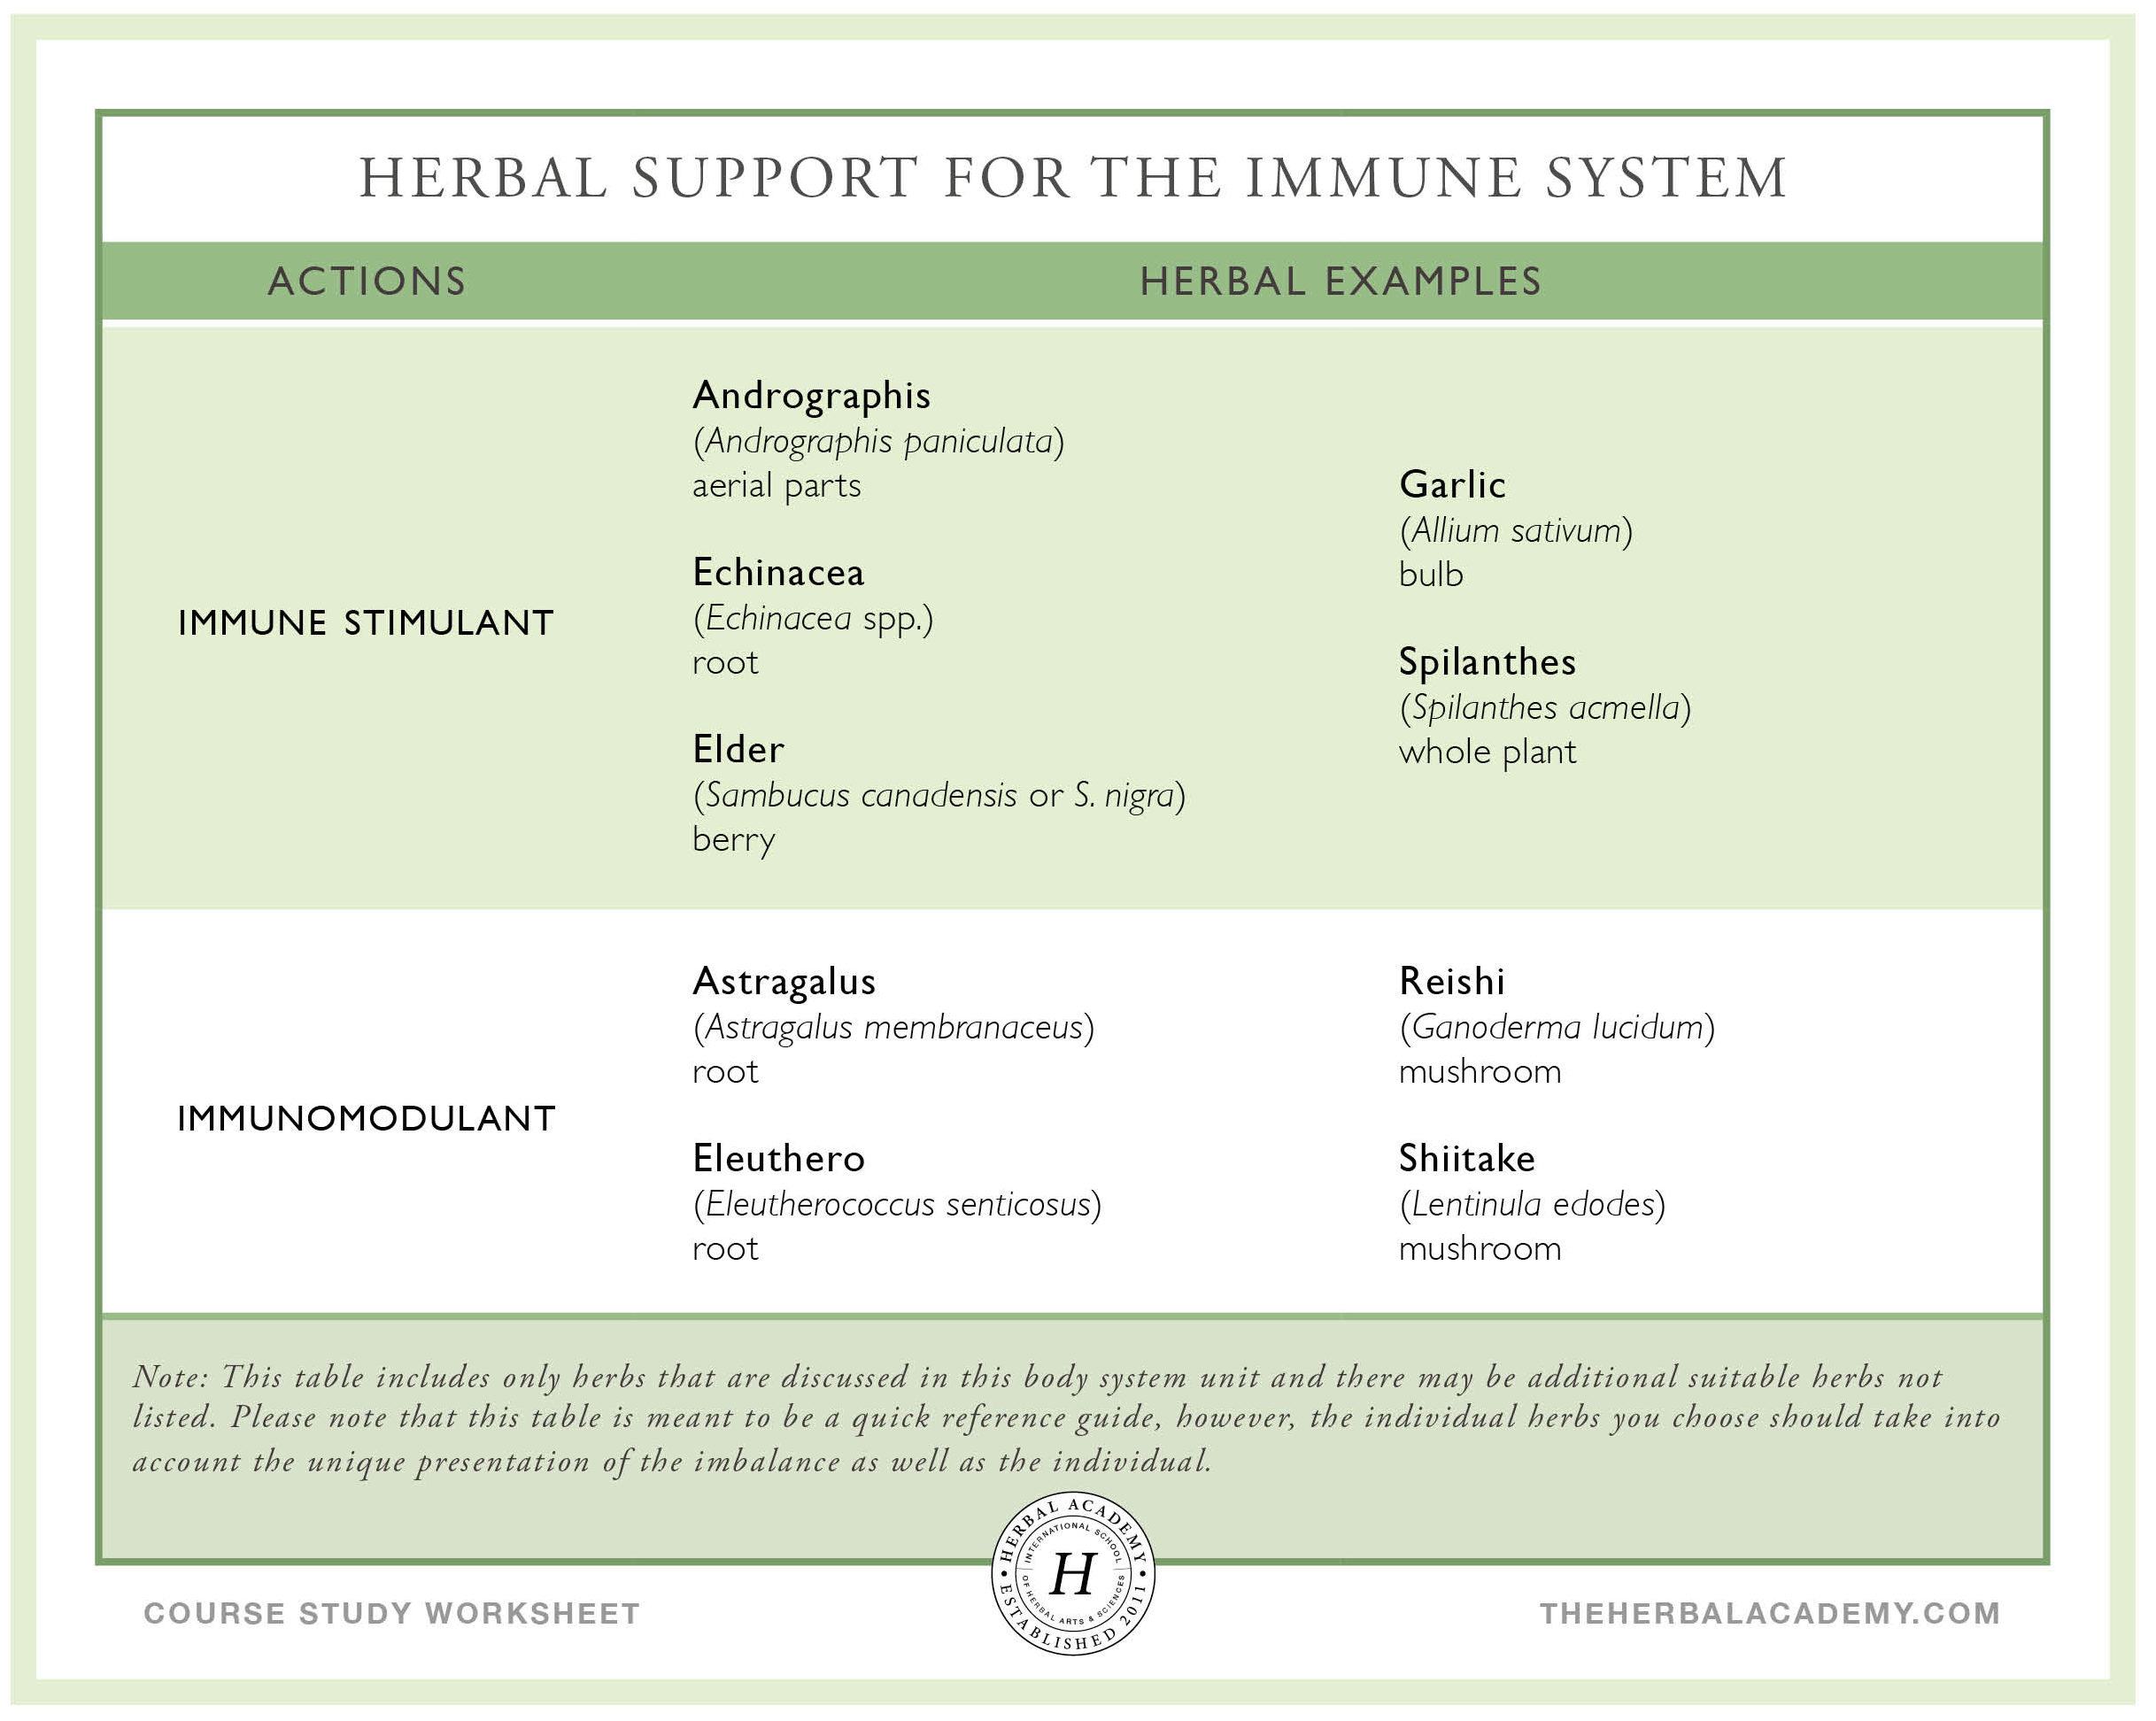
IMMUNOMODULANTS
Immunomodulant herbs have an amphoteric effect on immune function—they can both enhance the body’s natural defenses to improve resistance and help rebalance an overreactive immune response, as in the case of allergies and hypersensitivities. Many herbal immunomodulants, such as eleuthero (Eleutherococcus senticosus) root and reishi (Ganoderma lucidum) mushroom, are also adaptogens. This makes sense when you consider that adaptogens help the body respond in a non-specific way to all types of stress—infection and illness are certainly physiological stressors!
Astragalus – Astragalus membranaceus (Fabaceae) – Root
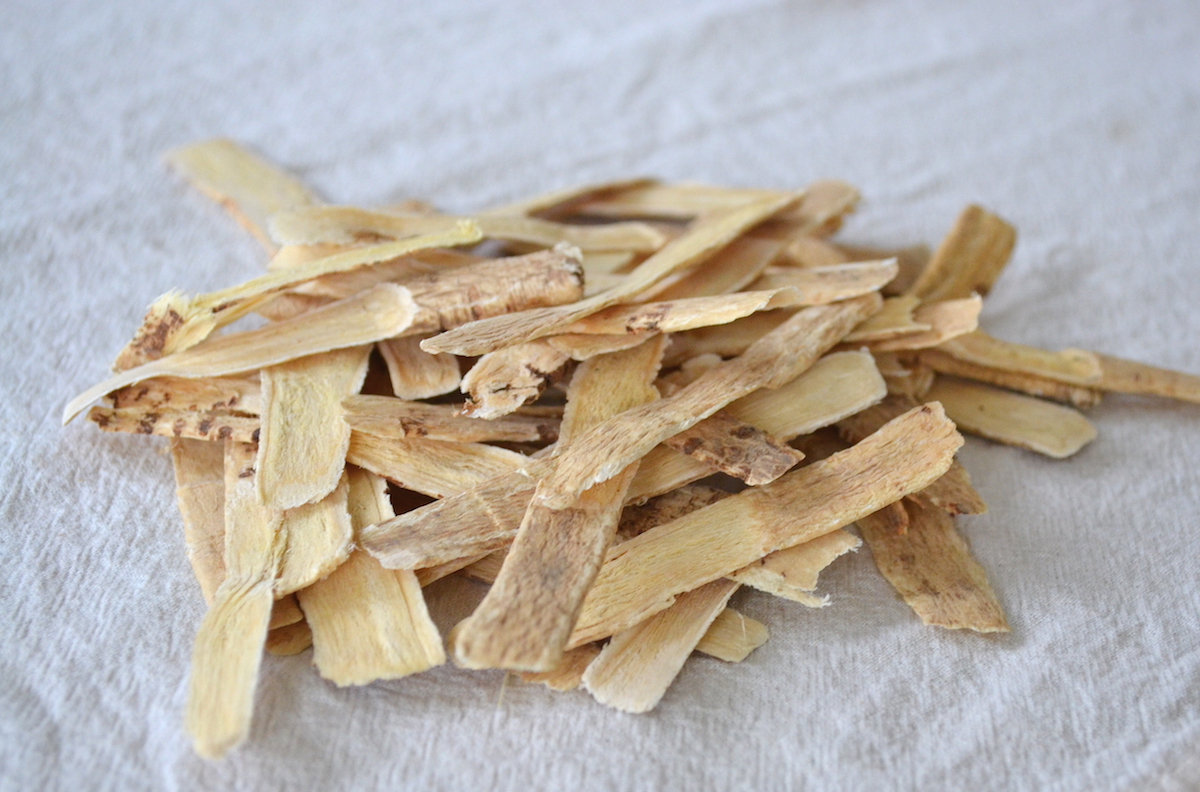
In Chinese medicine, astragalus is a classic immunomodulant. It is nourishing and sweet, and like all adaptogens can be taken long-term as a tonic. In fact, astragalus is often cooked into rice or taken as food in soups and broths all winter long to ward off illness.
Actions: Adaptogen, antioxidant, antiviral, cardiotonic, hepatic, hypotensive, immunomodulator, kidney tonic
Energetics: Slightly warming and moistening
Use: Astragalus is perhaps the most well-known of the immunomodulant herbs, and with good reason; it has been used for thousands of years in Chinese medicine to strengthen and restore vitality, and is now frequently used in Western herbalism to support both innate and acquired immunity and to boost deficient white and red blood cell counts. It’s an excellent choice for promoting overall resistance, rebuilding reserves during convalescence, and supporting a depleted individual with low immune function; it can also help shift from immune hyperreactivity to a more normalized response, making it useful in long-term management of allergies and other reactive inflammatory conditions (Mao et al., 2004; Matkovic et al., 2010).
Astragalus also has a protective effect on the liver, and this quality makes it useful as a support during some types of drug therapy to help minimize side effects.
It’s often used alongside chemotherapy drugs, particularly in modern Chinese protocols, and multiple trials have shown that use of astragalus-based herbal formulas can increase the effectiveness of some types of chemotherapy while reducing their side effects (Wang et al., 2016).
In Chinese medicine, astragalus is considered a tonifying herb for both the qi and the Blood; in this system, tonic herbs are not used during acute illnesses such as colds and the flu. Some Western herbal practitioners also consider astragalus contraindicated during acute illness, while others specifically suggest it as an immune support during viral infection (Mills & Bone, 2005).
Safety: Astragalus may increase the effects of corticosteroids and cyclophosphamide in individuals with autoimmune disease (Gardner & McGuffin, 2013).
Dose: Decoction: 9-30 g dried root/day divided into 1-3 doses (Mills & Bone, 2005); Tincture: 4-8 mL (1:5, 40%) 3x/day (Hoffmann, 2003).
Shiitake – Lentinula edodes (Marasmiaceae) – Mushroom
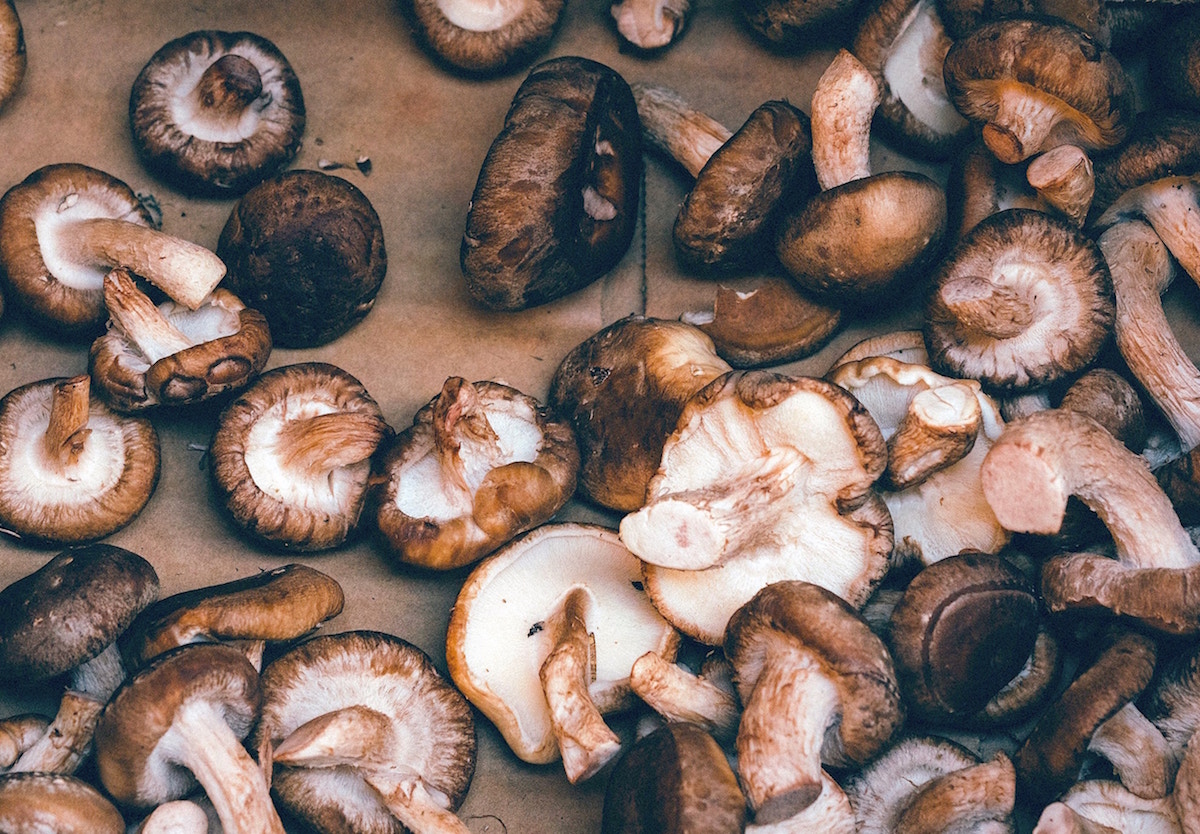
Shiitake is a mushroom native to China, Japan, and other parts of Asia that typically grows on broadleaf trees, including the shii tree, from which the mushroom takes its common name. It is among the most well-known of the mushrooms used in herbalism and is particularly well-suited for use as a therapeutic food—it has a long culinary history and a rich, earthy taste.
Actions: Antiviral, hepatic, hypocholesterolemic, immunomodulant
Energetics: Neutral to warming and slightly moistening
Use: Like other mushrooms used in herbalism, shiitake contains polysaccharides that stimulate immune function, notably T-cell activity. Compounds in shiitake also support the function of the innate immune response by stimulating white blood production and activity of natural killer cells (Stamets, 2002).
Several clinical trials have examined the therapeutic use of shiitake; one trial found that simply consuming 5-10 grams of dried shiitake mushrooms daily for 4 weeks increased levels of natural killer and T-cells, both important immune responders, and caused a decrease in markers of inflammation (Dai et al., 2015).
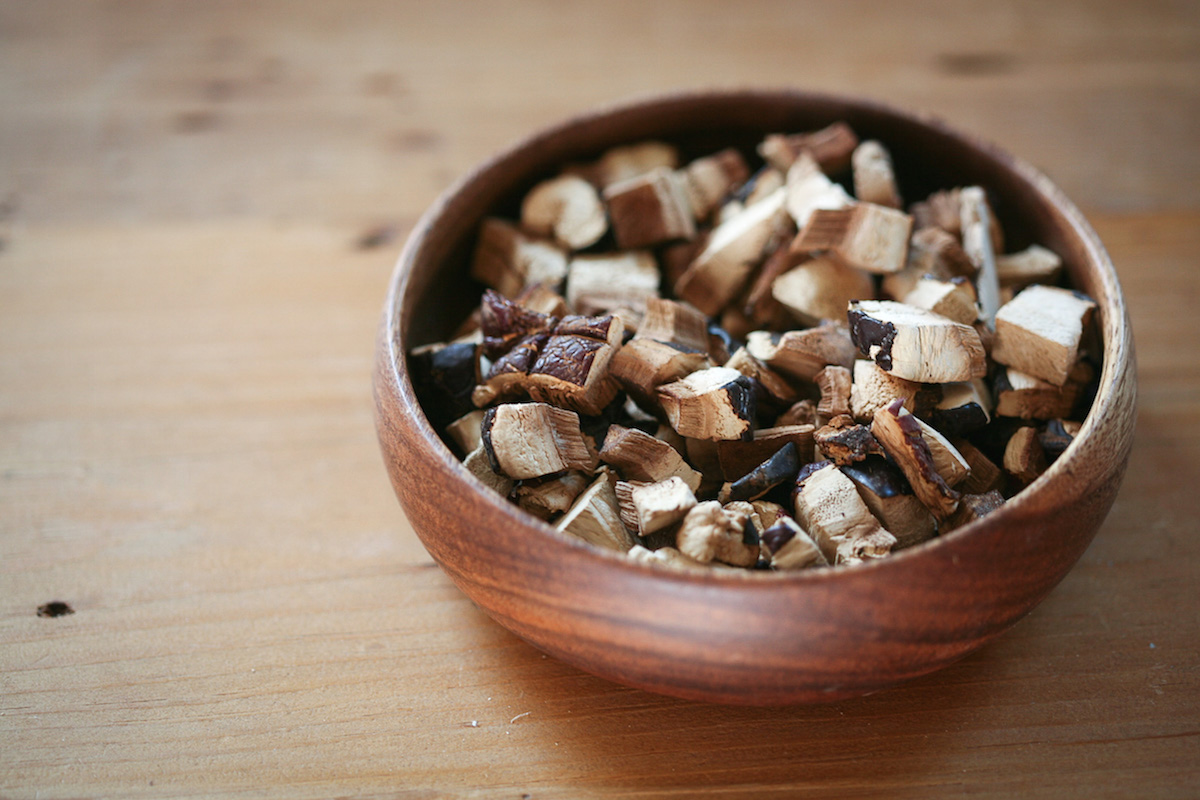
Shiitake mushrooms are both tasty and nutrient-rich, containing vitamins B2 and C, minerals such as potassium, calcium, and magnesium, essential amino acids, and, if grown in sunlight, vitamin D2 (Smith et al., 2002); they can easily be used fresh or dry in food-based preparations, including soup stocks and stir fries. Preparing high-quality tinctures of shiitake or other mushrooms is more complex than a simple maceration-extraction, and requires a two-phase extraction method that combines a water-based decoction with an alcohol-based extract.
Safety: Shiitake is food-like and generally well-tolerated, although large amounts may cause gastrointestinal disturbance in sensitive individuals. If you have autoimmune disease or are taking immunosuppressant drugs, therapeutic doses of shiitake are best used under the guidance of an experienced practitioner; culinary use is generally considered safe (Gardner & McGuffin, 2013).
Dose: Decoction (as tea or broth): 6-16 g dry mushroom daily, simmered for at least 1 hour (Hobbs, 1998).
Reishi – Ganoderma lucidum (Ganodermataceae) – Mushroom
Often called the herb of immortality, reishi comes to Western herbalism from the Chinese materia medica, where its name, ling zhi, translates as “spirit plant.” The species commonly used in China, Ganoderma lucidum, is less commonly found in the United States than G. tsugae; many herbalists find these two species can be used interchangeably. In addition to wildcrafting, reishi can be cultivated at home from commercially available plugs or spores.
Actions: Adaptogen, antioxidant, anti-inflammatory, antiviral, cardioprotective, hepatic, hypolipidemic, hypotensive, immunomodulant, kidney tonic, nervine
Energetics: Drying and neutral to warming
Use: As an immunomodulant, reishi can boost immunity when it is depressed, and can also help rebalance immune overactivity. Reishi is particularly useful when there is hypersensitivity with lung deficiency, as in allergic asthma, and is commonly used in Chinese medicine during chemotherapy to help restore deficient immune function (Winston & Maimes, 2007).
Reishi has a strong hepatoprotective effect, and in one study was shown to reverse signs of mild fatty liver disease (Chiu et al., 2017). It has a history of use as a cardioprotective and may help lower high cholesterol levels and protect against atherosclerosis, although this has yet to be demonstrated in clinical trials (Klupp et al., 2015).
Extra care is required when preparing reishi as a decoction or tincture; decoctions should be allowed to simmer for a minimum of 1 hour, and can benefit from a much longer extraction, up to 24 hours. (A slow cooker can be an excellent tool here!) There are some extra steps required when making a mushroom tincture, so if you’re planning to make your own, take time to do a little research on the best methods first—that way you can be sure you’ll get the most benefit out of your extract!
Safety: Reishi should be used with caution in individuals taking immunosuppressant, anticoagulant, or antiplatelet medications and should be avoided by individuals with mushroom allergies (Gardner & McGuffin, 2013).
Dose: Decoction: 3-12 g dried mushroom/day divided into 1-3 doses; Tincture: 4-8 mL (1:5, 30%) 3x/day (Kuhn & Winston, 2008).
IMMUNE STIMULANTS
Unlike immunomodulants, which can balance the immune response in either direction, immune stimulants turn up the volume of the immune response. They are often taken at the onset of illness and can be used throughout the acute phase of infection to help reduce its duration and intensity. During acute illness—at the start of a cold, for example—immune stimulants need to be taken frequently throughout the day, and sometimes even once or twice during the night, in order to keep the active compounds circulating throughout the body.
Echinacea – Echinacea spp. (Asteraceae) – Root, aerial parts
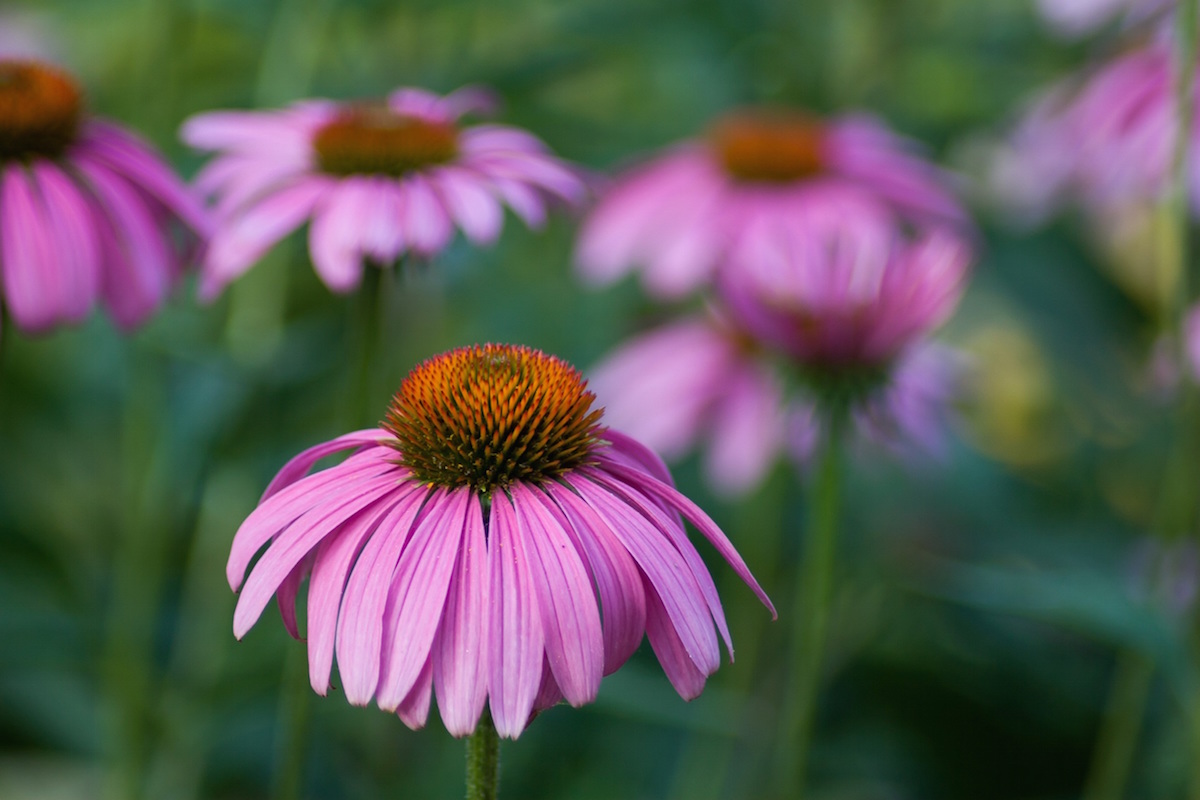
The root of this native North American perennial is one of the most commonly used herbs, which is one reason it’s listed as an at-risk plant, so be sure to purchase only sustainably cultivated echinacea, or grow your own! Echinacea is a prairie flower that prefers full sun; it is drought-tolerant, easy to grow from root divisions or starts, and attracts butterflies and other pollinators.
Actions: Alterative, antimicrobial, immunomodulant, immune stimulant, lymphatic, sialagogue
Energetics: Cooling
Use: Echinacea is primarily an immunostimulant, but it can also have a role in addressing allergies and autoimmunity. It is frequently used at the onset of infections—especially upper respiratory infections with swollen glands—for colds, the flu, and sinus, throat, and lung infections; it can also be used to help resolve infected wounds and improve lymphatic function (Awang, 1999).
In contemporary herbalism, echinacea is often recommended for short-term use. If you’re trying to stave off upper respiratory infection, any herb, including echinacea, should be used as soon as possible after the onset of symptoms—but that doesn’t mean echinacea is contraindicated after the first day or two of illness. In vitro research looking at the effect of echinacea in cells infected with rhinovirus, the microbe that causes the common cold, found that echinacea upregulates the activity of healthy cells, while simultaneously reducing the inflammatory activity of infected cells (Sharma et al., 2006). Thus, while echinacea does stimulate the immune system, it can also have overall anti-inflammatory activity during infection; this is one mechanism for its anti-inflammatory and vulnerary actions, and suggests that it can be appropriate to use echinacea throughout the course of active illness and infection.
If your tongue starts to tingle after taking an echinacea tincture—congratulations! This means your tincture is potent and contains all the right compounds. If you’re troubled by the temporary tingle, try diluting it with extra water.
Safety: Individuals with allergic sensitivity to other plants in the Asteraceae (daisy) family may be sensitive to echinacea. There is a theoretical concern with the use of echinacea in systemic diseases such as tuberculosis, human immunodeficiency virus (HIV), and autoimmune diseases, but definitive data supporting or refuting this theoretical concern is lacking (Gardner & McGuffin, 2013).
Dose: Tincture: 1-4 mL (1:5, 40%) 3x/day (Hoffmann, 2003); for acute situations, 30 drops every hour (Buhner, 2012).
Elder – Sambucus canadensis and S. nigra (Viburnaceae) – Berry, flower
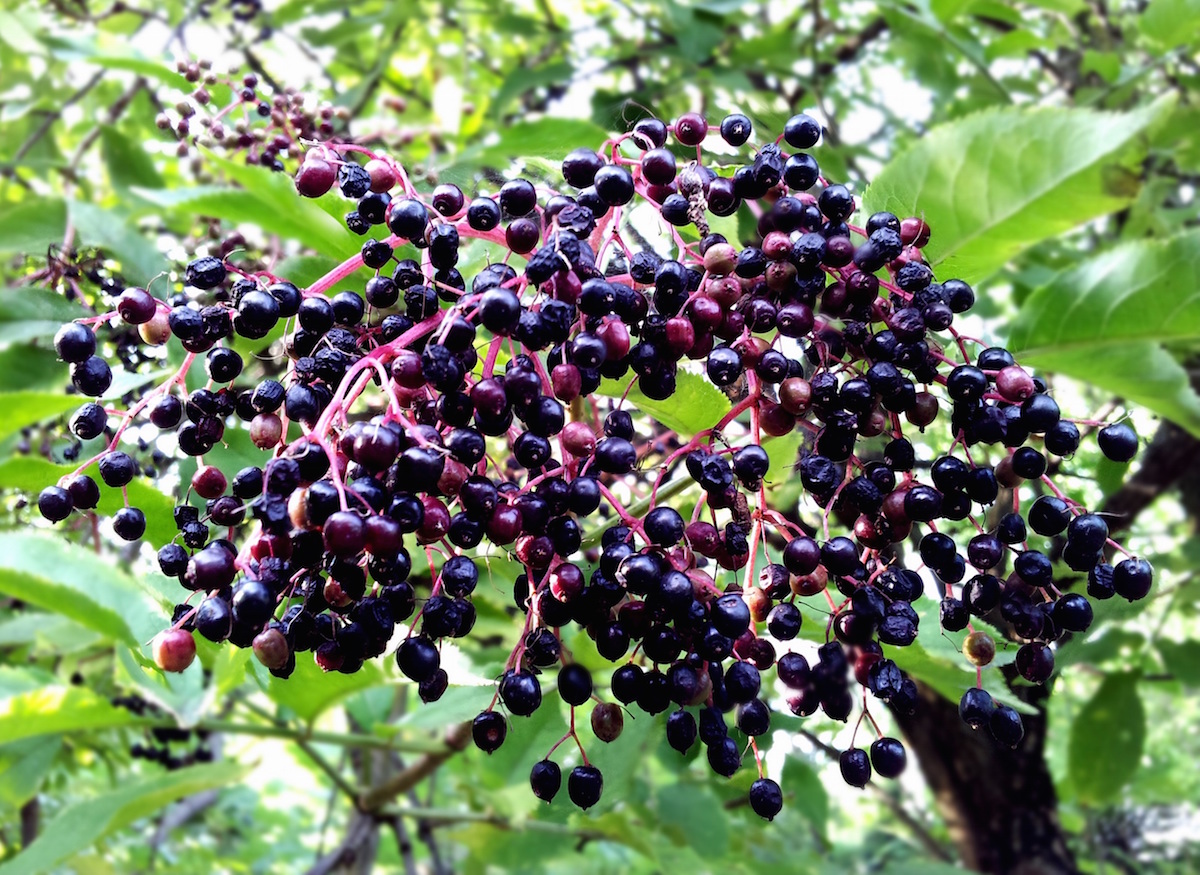
There are a number of different types of elder, but only some of them are used in herbalism. Luckily, it’s not hard to tell them apart if you’re harvesting the fruit: all of the elders with dark berries (blue, purple, or black) are varieties of black elderberry; red elderberry, from Sambucus racemosa, is mildly toxic and generally not used.
Actions: Berry: Anti-inflammatory, antioxidant, antiviral, immune stimulant; Flower: Alterative, anticatarrhal, anti-inflammatory, antispasmodic, diaphoretic, diuretic, nervine
Energetics: Cooling (berry); Cooling and drying (flower)
Use: The dark berries of the elder tree have a range of anti-inflammatory, antiviral, and antioxidant properties that support the immune system; elder is particularly useful during colds, the flu, and other respiratory ailments. Elderberry extract has antiviral properties, and helps cell membranes inhibit cold and flu viruses from attaching; it also boosts innate immune function, so it’s a great choice to help you stay healthy and stave off infection during cold and flu season (Hoffmann, 2003).
If you do come down with an infection, both elderberry and elderflower are useful to ease the discomforts of colds, the flu, and sinus infections. The elder berry is generally used for its immune stimulant and antiviral properties; elder flower is diaphoretic and relaxing, which makes it particularly appropriate in managing fever with restlessness. Elderflower also helps to ease mucous membrane inflammation and sinus congestion.
Safety: Elder bark, leaves, roots, seeds, and unripe berries are considered toxic (they may cause nausea, diarrhea, and depression of the central nervous system) due to the presence of cyanide-producing glycosides (American Botanical Council, 2004). Fresh elderberries also contain cyanogenic glycosides; however, the ripe fresh berries are considered safe unless consumed in high quantities or by someone sensitive to the compounds in the plant (Buhner, 2013). Cooking or drying elderberries reduces the cyanogenic glycoside content (Gardner & McGuffin, 2013).
Dose: Decoction (berry): 10 g dried berry several times/day (American Botanical Council, 2004); Tincture (berry): 4-6 mL (1:2, 25%) 4-6x/day (Kuhn & Winston, 2008); Infusion (flower): 9-15 g dried flower/day divided into 3 doses; Tincture (flower): 2-4 mL (1:5, 40%) 3x/day (Hoffmann, 2003).
Garlic – Allium sativum (Amaryllidaceae) – Bulb
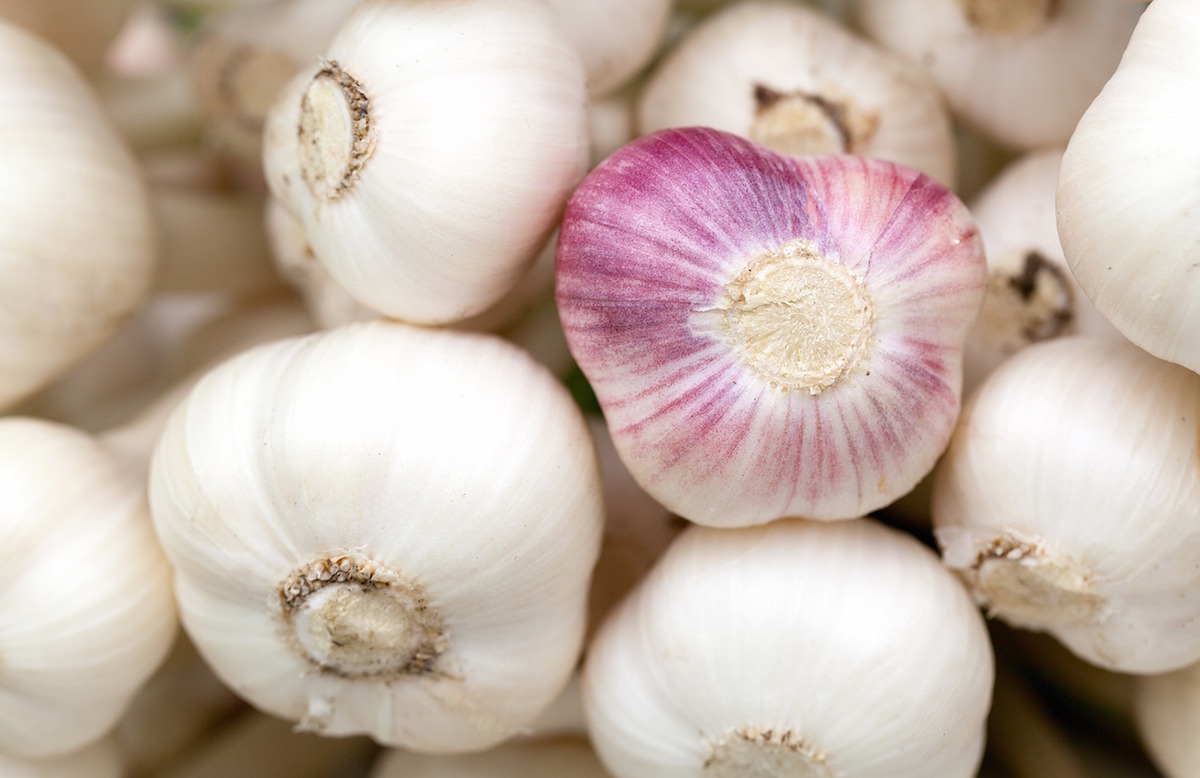
Garlic is beloved by herbalists and cooks alike for its strong flavor and long history of use as a culinary herb, immune booster, and heart-helper. Garlic can be grown in almost any climate and acts as a beneficial companion in the garden—some of the same compounds that promote cardiovascular health act as natural insect deterrents and fungicides for other plants growing nearby.
Actions: Anti-inflammatory, antimicrobial, cholagogue, diaphoretic, diuretic, expectorant, hypolipidemic, hypotensive
Energetics: Warming
Use: Garlic is strongly antimicrobial, with an affinity for the digestive and respiratory systems. It may act directly against pathogenic organisms in the gut, and active volatile oils are excreted through the lungs and the skin—as you (or your friends) may have noticed, if you’re a garlic lover! While this helps counteract infection, it also causes a notable body aroma that makes some people averse to using garlic therapeutically. Encapsulated aged garlic extract causes less odor on the breath and skin, and appears to improve overall immune function (Percival, 2016), although it is unlikely to have the same direct antimicrobial activity.
In addition to its direct action on pathogens, garlic can also ease some of the discomforts of a cold through its anti-inflammatory action, as well as shorten the duration of infection by stimulating the immune system, thinning mucus, and, by acting as a diaphoretic, helping to resolve fever.
To retain garlic’s beneficial properties it should not be heated at a high temperature or for too long. Spread on toast or add to tea towards the end of steeping time and add plenty of sweetener and lemon!
Safety: Not surprisingly, the most commonly reported side effect from garlic use is halitosis. Gastric upset and reflux can occur in sensitive individuals. Those with gastrointestinal sensitivities or ulcers may find that garlic aggravates their condition. Use only culinary amounts if taking blood thinners and during pregnancy, in the postpartum period, and during lactation. Avoid 2 weeks before and after surgical procedures (Mills & Bone, 2005).
Dose: A clove of garlic can be eaten daily for general support or 1 clove of garlic can be taken 3x/day during acute infections (Hoffmann, 2003).
Spilanthes – Acmella oleracea (Asteraceae) – Whole plant
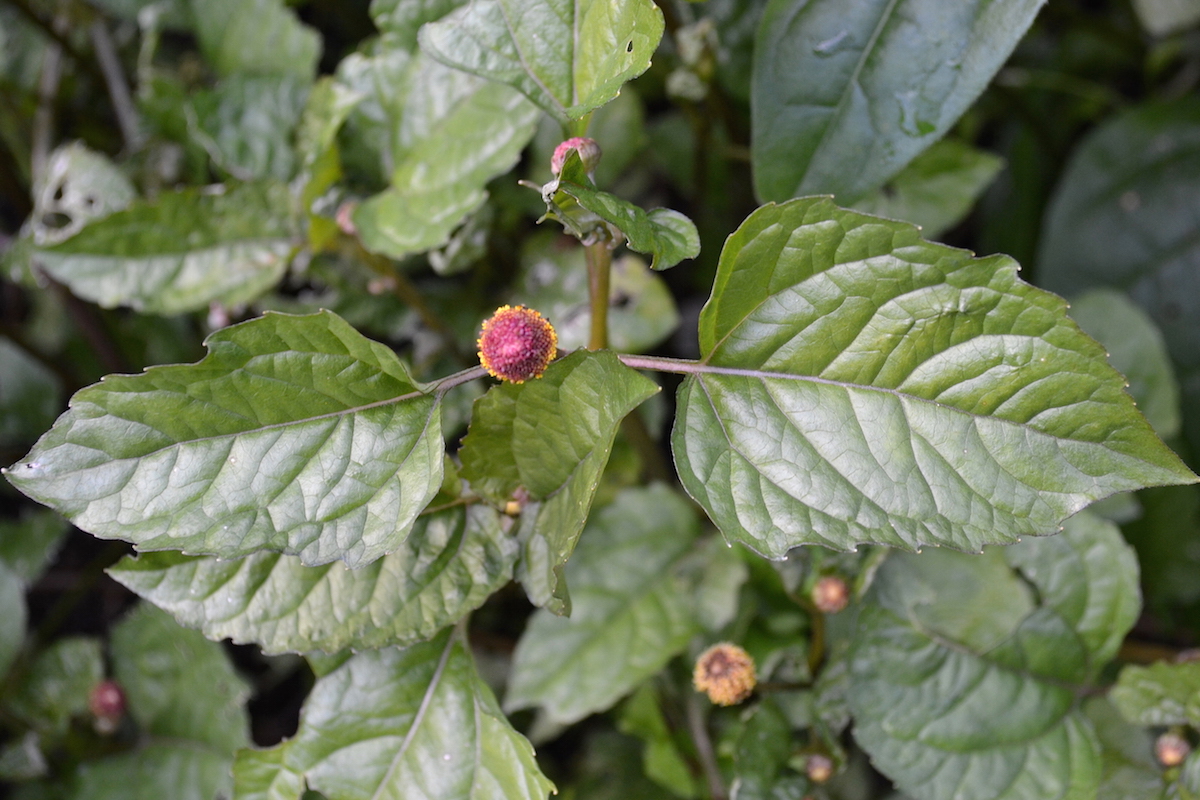
Spilanthes is a small, short-lived annual native to South America. It’s often grown as an ornamental—you may have seen it sold as “button-flower”—and makes an easy garden addition in most climates, though it is not frost hardy. Spilanthes grows quite quickly; the flowers can be harvested successively throughout the growing season before harvesting the whole plant, root to blossom, in late summer.
Actions: Analgesic, anti-inflammatory, antimicrobial, immune stimulant, sialagogue
Energetics: Cooling and moistening
Use: Spilanthes contains some of the same compounds found in echinacea, including the alkylamides that give both plants a tongue-tingling, locally numbing effect; this is much more pronounced in spilanthes, which is often used as an herb for toothache—spilanthes has a fairly strong local anesthetic effect and can be used to temporarily numb the mouth. It also has a systemic analgesic effect and may help alleviate trigeminal nerve pain (Prachayasittikul et al., 2013).
Spilanthes is also similar to echinacea in its antimicrobial, anti-inflammatory, and immune-stimulating properties; it hasn’t yet been subject to the same level of clinical research as echinacea, but spilanthes has been used in traditional herbalism for upper respiratory infection, infectious skin disease, and snake bite. It can be particularly useful when infection is accompanied by swollen lymph nodes near the jaw.
In contemporary Western herbalism, spilanthes is best known as an herb that promotes oral health; in addition to temporarily numbing pain, it can be used as an antimicrobial to help stave off or resolve tooth and gum infection, help prevent tartar accumulation, and moisten a dry mouth and dry socket conditions. Spilanthes also has some antifungal activity, which can make it useful in addressing oral thrush. It can also be used topically to resolve fungus on other parts of the body, such as the feet and toes.
Safety: There is limited safety data for spilanthes, and it is generally considered safe. Because of its strong dispersive nature, spilanthes should be used with caution during pregnancy. Chewing the plant or holding tincture in the mouth will cause oral numbness and increase salivation, which can lead to perceived difficulty swallowing; although the actual ability to swallow is not affected, this can be a distressing sensation if it’s unexpected.
Dose: Fresh flower heads or leaves can be chewed as needed for oral pain; Tincture: 5 drops to 1 mL (fresh plant: 1:2, 95%; dried plant: 1:5, 50%) 3x/day (Easley & Horne, 2016).
Andrographis – Andrographis paniculata (Acanthaceae) – Aerial parts
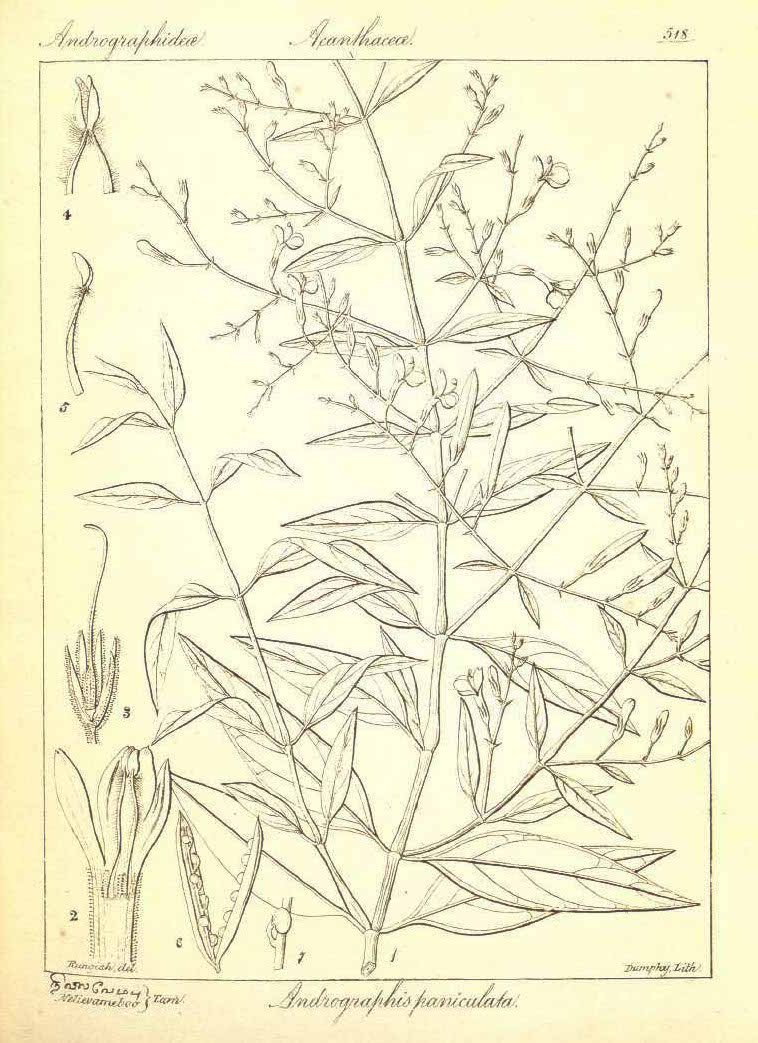
Andrographis is a long-season annual—it can take 160 days to mature—native to China and India. The aerial parts can be harvested before the plant reaches maturity, so andrographis can also be grown in temperate climates (Cech, 2009). Also known as “the king of bitters,” andrographis has long been used in Ayurveda, in which it is known as bhunimba (“neem of the earth”) because of its similarity in taste and action to neem (Azadirachta indica) (Pole, 2012).
Actions: Anthelmintic, anti-inflammatory, antioxidant, antiplatelet, antipyretic, bitter, choleretic, febrifuge, hepatic, immune stimulant
Energetics: Cooling
Use: As a bitter and immune stimulant, andrographis supports both antigen-specific and non-specific immune responses by affecting the stimulation and proliferation of immune cells and substances (Braun & Cohen, 2010). As an antioxidant, andrographis protects the body from the damaging effects of free radicals. The herb is also hepatic, shielding the liver from the damaging effects of toxins (Bone & Mills, 2013).
Studies have shown andrographis’ effectiveness in easing symptoms of upper respiratory tract infections, as well as preventing recurrence of infection when used alone and in conjunction with other herbs (e.g., Eleutherococcus senticosus) (Amaryan et al., 2003; Gabrielian et al., 2002; Saxena et al., 2010). Rhinitis, sinus pain, headache, and fatigue are some of the symptoms eased with the use of andrographis (Braun & Cohen, 2010).
While it is possible to take andrographis in tea form, it is extremely bitter and most individuals will prefer it as a tincture.
Safety: Andrographis should not be taken during pregnancy (Gardner & McGuffin, 2013).
Dose: Infusion: 1.5-5 g dried aerial parts/day divided into 1-4 doses; Tincture: 1-3 mL (1:5, 30%) 3x/day (Kuhn & Winston, 2008).
USING HERBAL SUPPORT FOR THE IMMUNE SYSTEM WITH AUTOIMMUNE CONDITIONS
In autoimmune conditions, the immune system mistakenly attacks the body’s own tissues, leading to inflammation and tissue damage. In some cases, herbs that stimulate or modulate the immune system may inadvertently worsen this process by further stimulating the immune response, leading to increased inflammation and tissue damage. Moreover, individual responses to herbs can vary widely, and what may be beneficial for one person’s health condition may exacerbate symptoms in another. So how should one approach using herbs, particularly herbal support for the immune system, when a known autoimmune condition is present?
Join herbalist Dana Hutchinson, RH(AHG) as she delves into the topic of immune herbs and autoimmunity, exploring how the immune system functions, how autoimmune conditions affect the body, commonly used immune herbs, and whether or not one should use these when an autoimmune condition is present.
Download the How to Use Immune Herbs With Autoimmune Conditions Video Transcript as a PDF
Download the How to Use Immune Herbs With Autoimmune Conditions Video Slides as a PDF
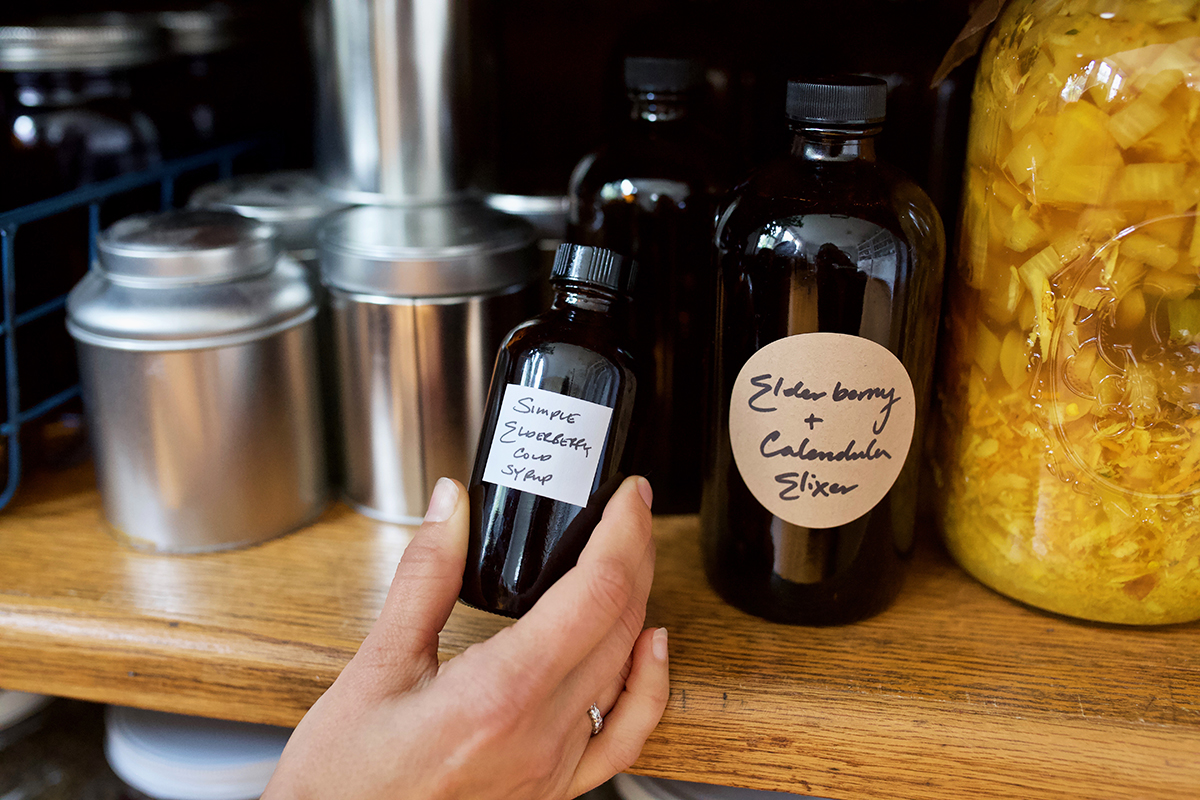
RECIPES FOR IMMUNE HEALTH
Adapted from The Herbal Kitchen by Kami McBride (McBride, 2010). This tonic is a traditional folk preparation used to support a strong immune system, to thwart the advance of a cold or the flu, and to stoke the digestive fire. The vinegar/honey combination helps soothe a sore throat and masks the flavor of the pungent herbs. ½ cup fresh ginger (Zingiber officinale) rhizome, gratedFire Tonic
½ cup fresh horseradish (Armoracia rusticana) root, grated
1 onion, finely chopped
4 cloves garlic (Allium sativum), finely chopped
¼ tsp cayenne (Capsicum spp.) fruit powder
4 cups apple cider vinegar
Honey to sweeten (at least 450 g (16 oz))
Join Herbal Academy team member Hannah Lasorsa as she demonstrates how to make her version of the famous Fire Cider recipe.
Download the Making Fire Cider Video Transcript as a PDF
Because this tea combines leafy aerial plant parts with roots and berries, it is prepared using a combined decoction-infusion method: you’ll first simmer the roots and berries in a decoction, then add and steep the leaves and flowers in an infusion. This cocktail of tasty immune boosters is worth the extra step, especially if you’re trying to fend off illness. 3 tbsp lemon balm (Melissa officinalis) aerial partsGet Strong, Stay Well Tea
2 tbsp peppermint (Mentha x piperita) leaf
2 tsp elder (Sambucus canadensis or S. nigra) flower
2 tbsp elder (Sambucus canadensis or S. nigra) berry
1 tsp echinacea (Echinacea spp.) root
1 tsp licorice (Glycyrrhiza glabra) root
1 tsp rose (Rosa spp.) hips
1 tsp astragalus (Astragalus membranaceus) root
Download the Herbal Support for the Immune System Worksheet as a PDF
CONCLUSION
Most of the time, the immune system chugs along tirelessly, working constantly to protect us from pathogens and filtering out dead cells and other debris in need of recycling. It’s only when our immune defenses falter, or go into overdrive, that we take note. Even small hiccups in immune function can feel like a big deal, as you already know if you suffer from seasonal allergies or frequent winter colds! These all-too-common complaints are a great place for beginning herbalists to experiment with simple herbal preparations. As you begin to work with immune-supportive herbs, you may find that, over time, the common cold becomes less and less common in your household.
RECOMMENDED RESOURCES
Herbal Antibiotics by Stephen Harrod Buhner
Herbal Antivirals by Stephen Harrod Buhner
Herbal Medicine from the Heart of the Earth by Sharol Tilgner
Rosemary Gladstar’s Herbal Recipes for Vibrant Health by Rosemary Gladstar
Amaryan, G., Astvatsatryan, V., Gabrielyan, E., Panossian, A., Panosyan, V., & Wikman, G. (2003). Double-blind, placebo-controlled, randomized, pilot clinical trial of ImmunoGuard® – a standardized fixed combination of Andrographis paniculata Nees, with Eleutherococcus senticosus Maxim, Schizandra chinensis Bail. and Glycyrrhiza glabra L. extracts in patients with Familial Mediterranean Fever. Phytomedicine, 10(4), 271-285. https://doi.org/10.1078/094471103322004767 American Botanical Council. (2004). The ABC clinical guide to elderberry. Retrieved from http://cms.herbalgram.org/press/files/elderberry-scr.pdf Awang, D.V.C. (1999). Immune stimulants and antiviral botanicals: Echinacea and ginseng. In J. Janick (ed.), Perspectives on New Crops and New Uses (pp. 450-456). Alexandria, VA: ASHS Press. Bone, K., & Mills, S. (2013). Principles and practice of phytotherapy. Toronto, Ontario: Churchill Livingstone. Braun, L., & Cohen, M. (2010). Herbs and natural supplements. Sydney, Australia: Elsevier. Buhner, S.H. (2012). Herbal antibiotics. North Adams, MA: Storey Publishing. Buhner, S.H. (2013). Herbal antivirals. North Adams, MA: Storey Publishing. Cech, R. (2009). The medicinal herb grower. Williams, OR: Horizon Herbs, LLC. Chiu, H.F., Fu, H.Y., Lu, Y.Y., Han, Y.C., Shen, Y.C., Venkatakrishnan, K., … & Wang, C.K. (2017). Triterpenoids and polysaccharide peptides-enriched Ganoderma lucidum: A randomized, double-blind placebo-controlled crossover study of its antioxidation and hepatoprotective efficacy in healthy volunteers. Pharmaceutical Biology, 55(1), 1041-1046. http://doi.org/10.1080/13880209.2017.1288750 Dai, X., Stanilka, J.M., Rowe, C.A., Esteves, E.A., Nieves, C., Spaiser, S.J., … & Percival, S.S. (2015). Consuming Lentinula edodes (Shiitake) mushrooms daily improves human immunity: A randomized dietary intervention in healthy young adults. Journal of the American College of Nutrition, 34(6), 478-487. http://doi.org/10.1080/07315724.2014.950391 Easley, T., & Horne, S. (2016). The modern herbal dispensatory. Berkeley, CA: North Atlantic Books. Gabrielian, E.S., Shukarian, A.K., Goukasova, G.I., Chandanian, G.L., Panossian, A.G., Wikman, G., & Wagner, H. (2002). A double blind, placebo-controlled study of Andrographis paniculata fixed combination Kan Jang in the treatment of acute upper respiratory tract infections including sinusitis. Phytomedicine, 9(7), 589-597. https://doi.org/10.1078/094471102321616391 Gardner, Z., & McGuffin, M. (Eds.). (2013). American Herbal Products Association’s botanical safety handbook. Boca Raton, FL: CRC Press. Hobbs, C. (1998). Medicinal mushrooms III. Retrieved from https://www.christopherhobbs.com/library/articles-on-herbs-and-health/medicinal-mushrooms-3/ Hoffmann, D. (2003). Medical herbalism: The science and practice of herbal medicine. Rochester, VT: Healing Arts Press. Klupp, N.L., Chang, D., Hawke, F., Kiat, H., Cao, H., Grant, S.J., & Bensoussan, A. (2015). Ganoderma lucidum mushroom for the treatment of cardiovascular risk factors. Cochrane Database of Systematic Reviews, 2, CD007259. http://doi.org/10.1002/14651858.CD007259.pub2 Kuhn, M., & Winston, D. (2008). Herbal therapy and supplements. Philadelphia, PA: Lippincott Williams & Wilkins. Mao, S.P., Cheng, K.L., & Zhou, Y.F. (2004). Modulatory effect of Astragalus membranaceus on Th1/Th2 cytokine in patients with herpes simplex keratitis. Chinese Journal of Integrated Traditional and Western Medicine, 24(2), 121-123. Matkovic, Z., Zivkovic, V., Korica, M., Plavec, D., Pecanic, S., & Tudoric, N. (2010). Efficacy and safety of Astragalus membranaceus in the treatment of patients with seasonal allergic rhinitis. Phytotherapy Research: An International Journal Devoted to Pharmacological and Toxicological Evaluation of Natural Product Derivatives, 24(2), 175-181. http://doi.org/10.1002/ptr.2877 McBride, K. (2010). The herbal kitchen. New York, NY: William Morrow and Company. MedLine Plus. (2018). Immune response. United States National Library of Medicine. Retrieved from https://medlineplus.gov/ency/article/000821.htm Mills, S., & Bone, K. (2005). The essential guide to herbal safety. St. Louis, MO: Elsevier Health Sciences. Milton, K. (2002). Hunter-gatherer diets: wild foods signal relief from diseases of affluence. Human diet: its origin and evolution, 111-22. Percival, S.S. (2016). Aged garlic extract modifies human immunity. The Journal of Nutrition, 146(2), 433S-436S. http://doi.org/10.3945/jn.115.210427 Pole, S. (2012). Ayurvedic medicine. Philadelphia, PA: Singing Dragon. Prachayasittikul, V., Prachayasittikul, S., Ruchirawat, S., & Prachayasittikul, V. (2013). High therapeutic potential of Spilanthes acmella: A review. EXCLI Journal, 12, 291-312. Saxena, R.C., Singh, R., Kumar, P., Yadav, S.C., Negi, M.P.S., Saxena, V.S., … Amit, A. (2010). A randomized double blind placebo controlled clinical evaluation of extract of Andrographis paniculata (KalmCold™) in patients with uncomplicated upper respiratory tract infection. Phytomedicine, 17(3-4), 178-185. https://doi.org/10.1016/j.phymed.2009.12.001 Sharma, M., Arnason, J.T., Burt, A., & Hudson, J.B. (2006). Echinacea extracts modulate the pattern of chemokine and cytokine secretion in rhinovirus‐infected and uninfected epithelial cells. Phytotherapy Research: An International Journal Devoted to Pharmacological and Toxicological Evaluation of Natural Product Derivatives, 20(2), 147-152. http://doi.org/10.1002/ptr.1824 Smith, J., Rowan, N., & Sullivan, R. (2002). Medicinal mushrooms: Their therapeutic properties and current medical usage with special emphasis on cancer treatments. London, UK: Cancer Research UK. Stamets, P. (2002). Mycomedicinals (3rd ed.) Olympia, WA: MycoMedia Productions. Wang, S.F., Wang, Q., Jiao, L.J., Huang, Y.L., Garfield, D., Zhang, J., & Xu, L. (2016). Astragalus-containing Traditional Chinese Medicine, with and without prescription based on syndrome differentiation, combined with chemotherapy for advanced non-small-cell lung cancer: A systematic review and meta-analysis. Current Oncology, 23(3), e188. http://doi.org/10.3747/co.23.2920 Winston, D., & Maimes, S. (2007). Adaptogens: Herbs for strength, stamina, and stress relief. Rochester, VT: Healing Arts Press.
REFERENCES